The month of November we are asked to make Mozzarella. This cheese is Italian (meaning to tear) was originally made with Water Buffalo milk. Here in North America most all of Mozzarella is made with cows milk.
This recipe is intensive...I didn't just say that it is wrote in the preface of this recipe! I have made Mozzarella a lot of times & never used a method like this Traditional recipe.
This recipe is intensive...I didn't just say that it is wrote in the preface of this recipe! I have made Mozzarella a lot of times & never used a method like this Traditional recipe.
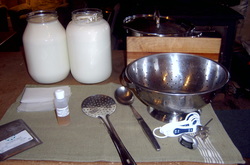
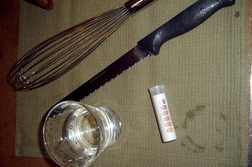
This is most of my supplies to make Mozzarella. I will show you what I forgot to put on this photo in the next photo! HA!
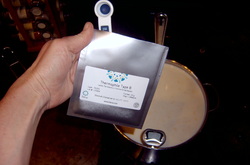
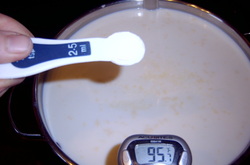
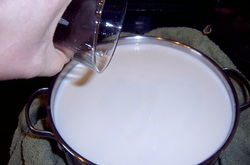
I doubled the batch, heating two gallons of whole milk to about 95 deg. I then added Thermo B powder to this.
After I sprinkled this Thermo B on top of the milk, I let this sit for 5 minutes. It allows the Thermo B powder to rehydrate. I stirred this in well.

Using a towel, this helps keep the milk from loosing the temperature I want this milk to stay at for ripening. Ripening process is forty-five minutes.
At this point I add rennet diluted in water & stir in with an up & down motion for 60 seconds. This is covered again & let it rest for 1 hour or until there is a clean break.
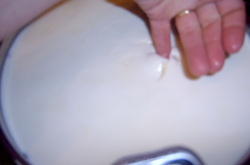
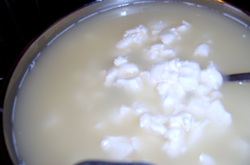
Here is the clean break.
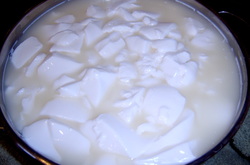
I do not follow the directions here...as I have said before...I have made cheese that was way to dry...so instead of cutting the curd into 1/2 inch pieces I cut them into 2 inch grid and made a couple swipes diagonal in two different directions. Then I stir this with a CAREFUL folding motion.
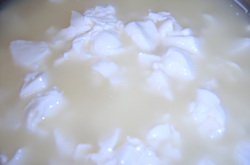
Next, I begin to raise the temperature slowly over 30 min from 90 some deg to 105 deg. This picture is about 10 min into this process.
I took this picture about 20 min into this process. You can see the curds are starting to shrink. Still stirring with a careful folding manner. At this time, you let the curds rest for another 10 min, stirring. After this process, let the curds set for 15 min so the curds will fall to the bottom of the pot.
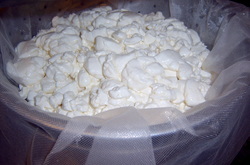
We put this in a cheese cloth lined colander for the whey to drain off the cheese for 15 minutes.
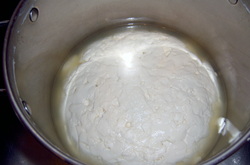
I then put the curd mass into a pot in the sink of water at 105 deg for two hours, flipping twice...this is about 30 min into that.
This is almost two hours into this process. I have flipped this twice now.
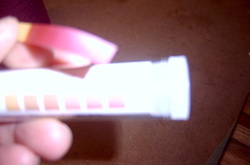
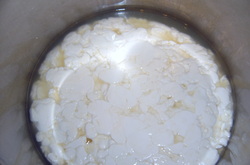
I never used the PH strips...so for fun...I have 15 min left of the two hours. I tested this...The test turned out higher than 6.2...I need 4.9 & 5.2....my first test is berry red...it needs to be tan to slight pinkish tan.
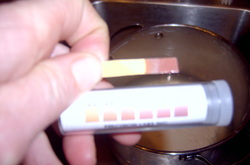
It has been two hours of testing the PH every 30 min. You can see in my very poor quality photo that the PH is coming down. I (THINK) I'm close! Can you hear my thoughts? I think I want a digital PH tester...
I checked, waited, checked, waited, checked...you get the picture! ha haha they say when the PH drops to 5.6 it will drop FAST....so start checking every 15 min. I did that a few times, well more than a few. NEXT picture will show you! It is ready...as good as I can tell. This process took two more hours.
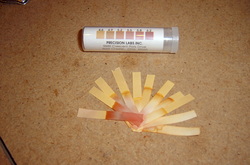
This is the tests! ha ha ha haha
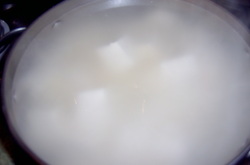
I took it out of the pot & let it drain in the colander for a few min. while I was heating the water to near 180 deg.
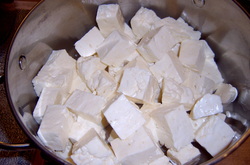
I cut this into 1 inch cubes...but I think it was GENEROUS one inch cubes.
Putting in a pot of 180 deg water, I worked this with two wooden spoons to mat it together & knead it.
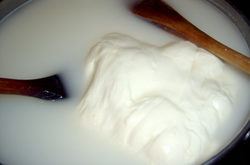
You can see this starting to mat together. I am working it, kneading & helping this form a solid ball.
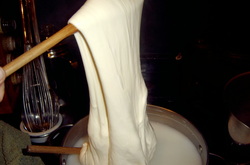
I am starting to stretch this. This was my first attempt to stretch this. I did not use plastic kitchen gloves, cause I DID NOT like the smell of them & wondered what chemicals it put in the cheese.
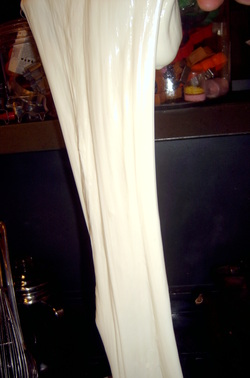
CAN YOU SAY STRETCH? It was pretty impressive in real life...if I had someone else to take a picture, just maybe we could be in the gennis book of world records. ha haha
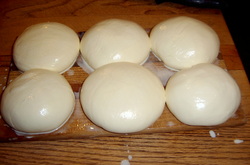
This is after I shaped them. They are soft. I am hoping! After I took them & shaped them they flattened out...so just maybe they will be soft! I did not dip them in ice water, as I was able to just pick them up & give them a quick reshape!
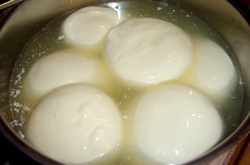
In the brine they go. This is brine I made of salt & whey. I am told it NEVER goes bad. I tasted it & it is salty & sweet still, I think I made this brine in August.

I put a plate on this, to keep the cheese submerged. This will be done in 20 min. Next picture my cheese is done for this month! YAY!!!!!

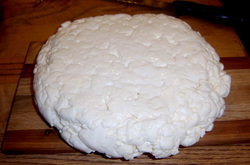
Here is my finished cheese! It is soft! I am SO GLAD!!!! Firm enough that it holds its shape, but soft to cut & soft in my mouth.
Appearance: heaven
Nose (aroma): Smelled sweet
Overall Taste: Tasted sweet & tangy, almost a fruity tone.
Sweet to Salty: Slightly sweet and a little salty
Mild (mellow) to Robust to Pungent (stinky): mild
Mouth Feel: (gritty, sandy, chewy, greasy, gummy, etc.): very smooth & creamy & melty & cheesy, with a slight little squeak!
YUM!
 RSS Feed