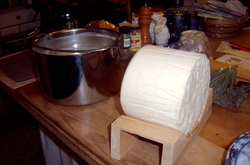
Gruyere is a cows milk cheese, having a French name. This is a Swiss version. Sometimes Gruyere has holes or eyes, it is a classic fondue cheese, with a nutty flavor that gets sweeter the longer it is aged. Suggested aging 2 months to 2 years.
Picture
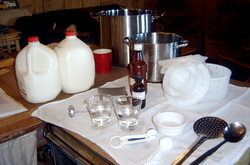
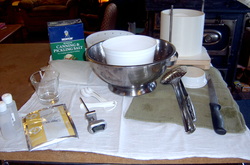
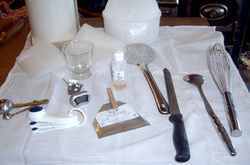
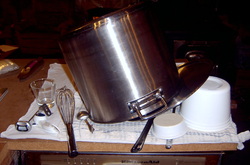
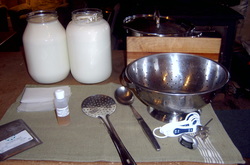
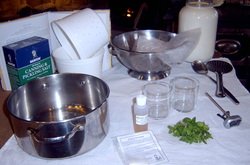
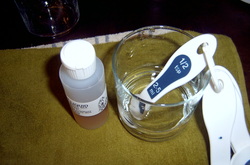
Here are all my supplies. I have sanitized everything and laid them on a clean towel. I did forget to put the salt on this for the picture...so just imagine I have a box of salt in this picture. Notice...I am using store bought milk!

Picture
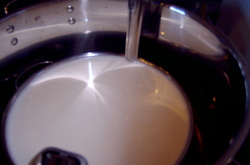
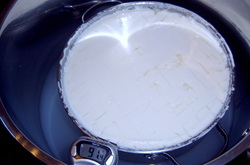
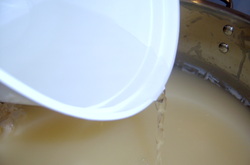
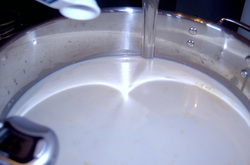
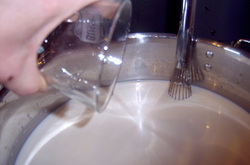
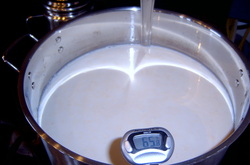
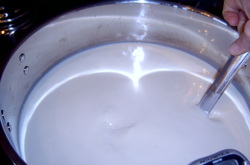
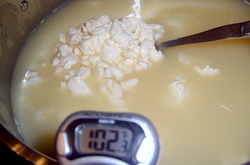
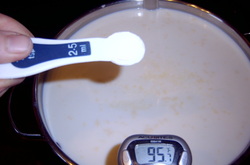
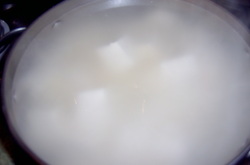
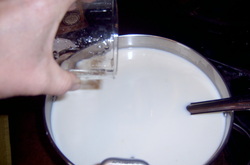
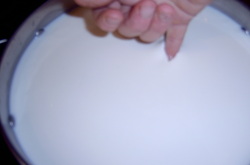
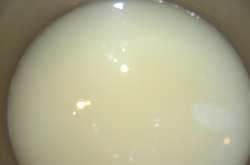
Warm the milk to 90 deg. I am a rebel, at heart....did you know that h ah aha h!!! I will tell you why....
The book suggested that I heat the milk in a water bath...but I wanted to heat it on the burner on low....I did & then I had a heck of a time getting it in the water bath with out slopping it!

Picture
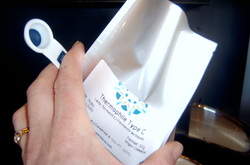
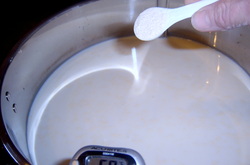
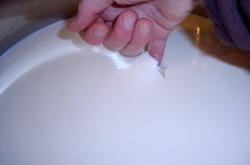
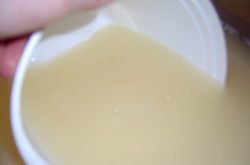
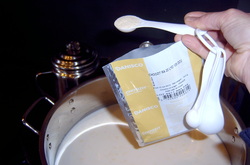
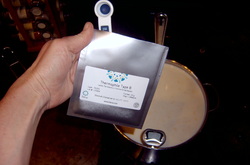
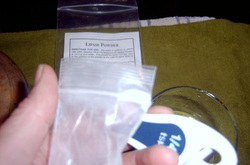
I added Thermo C powdered starter culture.

Picture
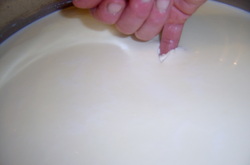
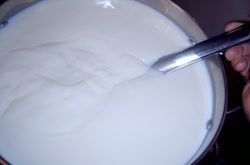
I am sprinkling the culture on top and Let this rehydrate for a few minutes. 

Picture
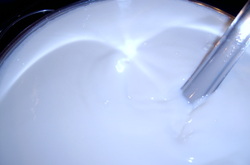
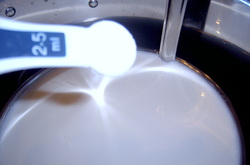
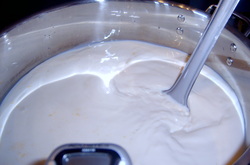
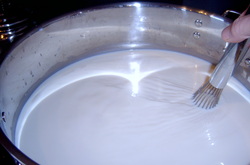
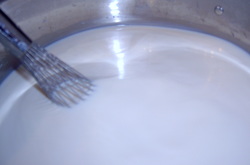
Here is a picture of me stirring the milk. I love it when still pictures can show movement. Stir this in an up and down motion Keep this temp for 30 min to let it ripen.

Picture
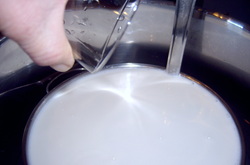
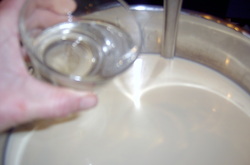
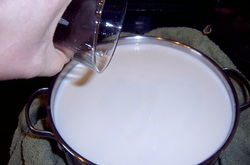
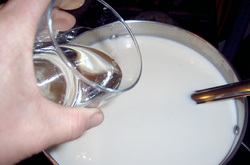
I now add calcium chloride diluted in water. Stir for one minute. I need this as I am using store bought milk that has been homogenized. With out this, the cheese would not turn out.

Picture
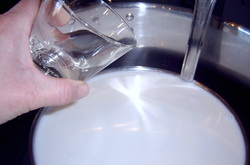
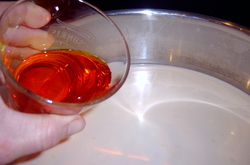
Now I am adding the rennet diluted in water. Stirring for one minute. Cover and let sit for 30-40 minutes or until curd gives a clean break.

Picture
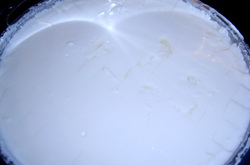
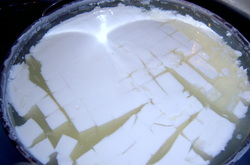
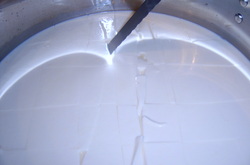
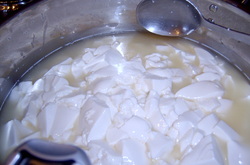
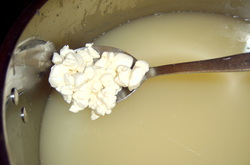
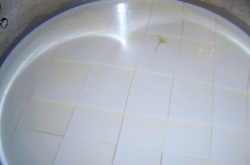
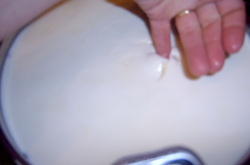
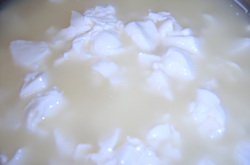
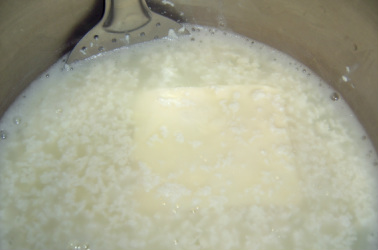
This is after I cut the curd. This cheese really did not give a clean break even after 40 minutes. I think it is the store bought milk I used. I will be looking for another brand that hopefully will allow me to make a correct cheese.

Picture
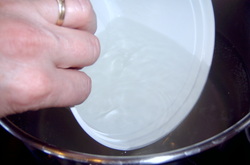
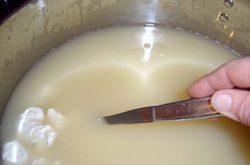
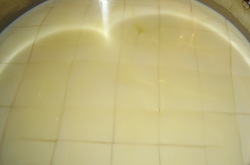
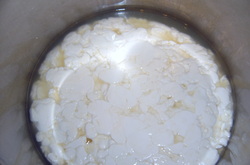
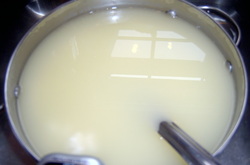
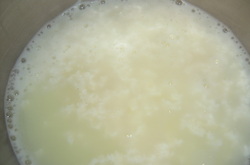
This is after I let it sit 5 minutes. You can see the curds are starting to shrink. We will not be not stirring this until we have heated the curds up to 120 deg for 1 hour.

Picture
This is about 30 minutes into it. The curds have really shrunk.

Picture
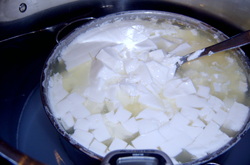
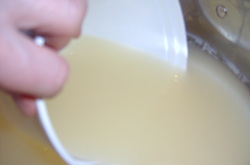
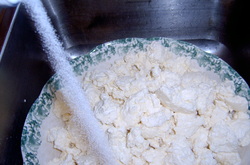
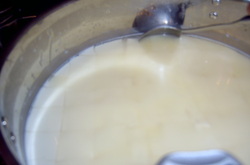
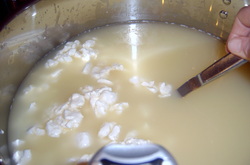
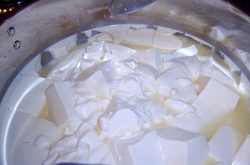
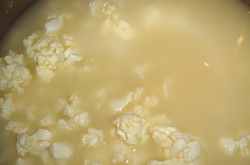
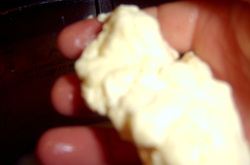
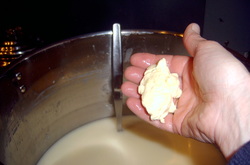
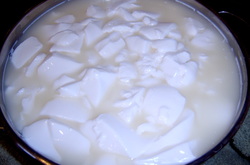
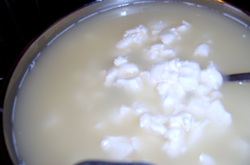
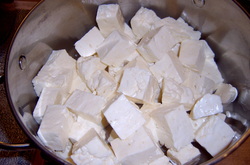
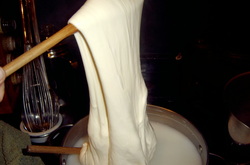
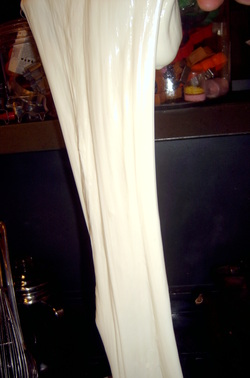
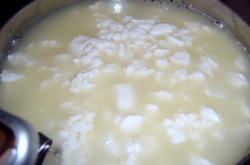
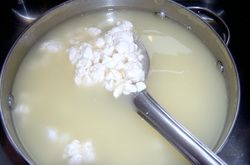
This is after an hour. I gave it a stir and the curds were suppose to be firm & stretchy & instead they broke up to pieces! I was horrified....it is the store bought milk. Some other cheese people have told me they have had the same trouble & I will be searching for other brands of milk.

Picture
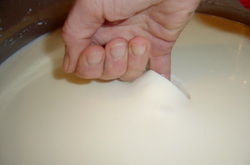
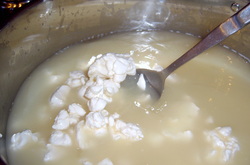
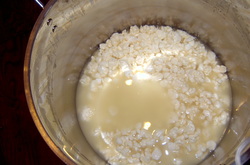
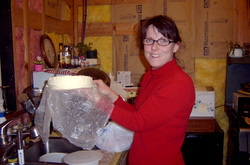
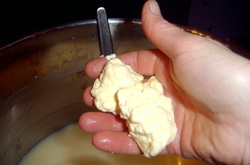
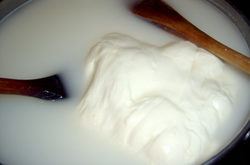
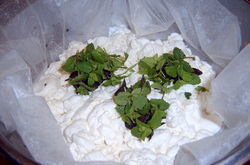
This is what the mess looked like. I talked to other Ian...a cheese friend of mine. He suggested I keep making the cheese and it will all work out in the end. You stir this for 15 minutes, then let it set for 20 so the curds can sink. I was upset enough about this not turning out I forgot to let it set for 20 min....oh, well...ha hahah

Picture
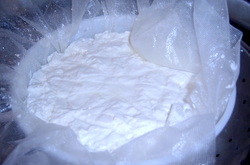
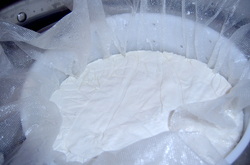
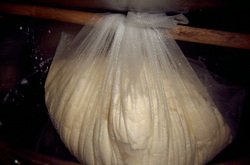
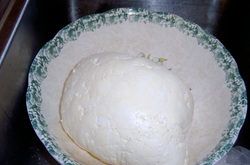
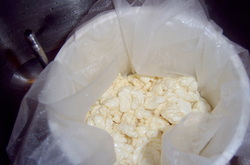
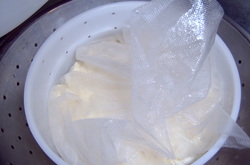
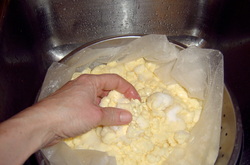
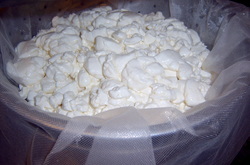
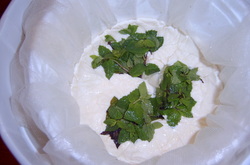
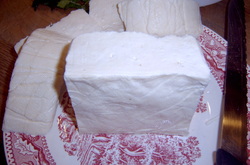
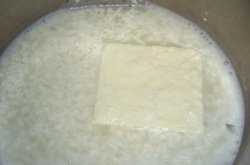
I put this in a cheese cloth lined tomme mould.

Picture
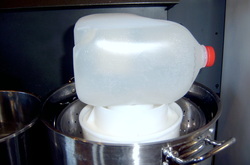
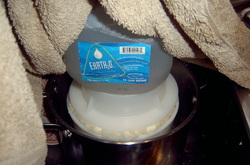
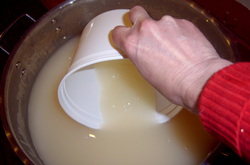
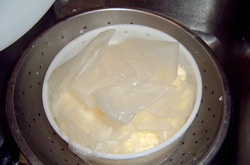
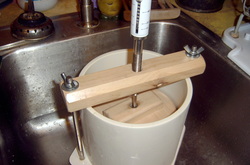
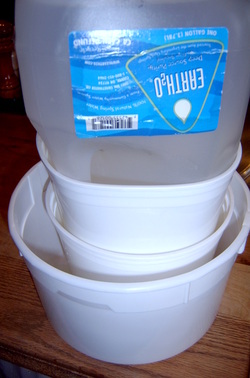
Press for one hour at 8 pounds. I am using the milk jug as it is 8 pounds nearly full of water.

Picture
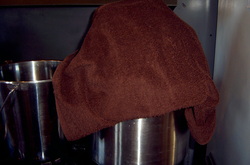
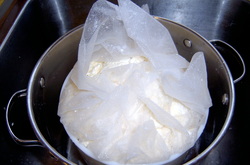
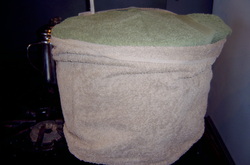
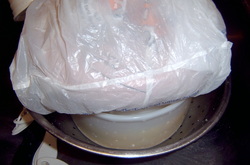
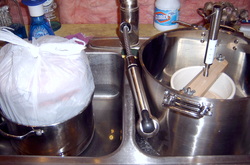
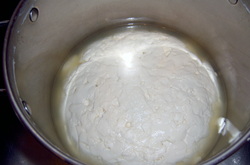
I press this in the pot covered in a towel to help keep extra moisture in.

Picture
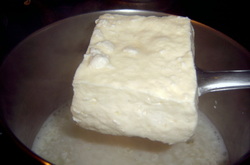
Flip & redress. Press at 10 pounds pressure for 12 hours. THAT would have been 3am! So I let it press till 5:30 am. I should have redressed it one more time in the middle of the night & next time I will do that...so there are no marks from the cheese cloth.
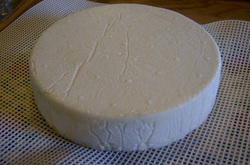
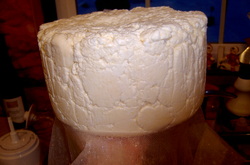
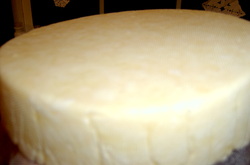
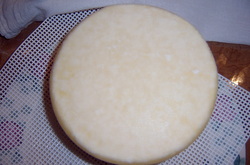
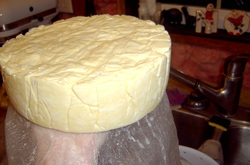
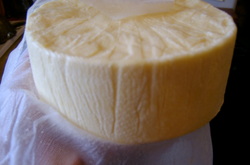
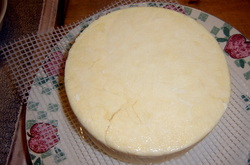
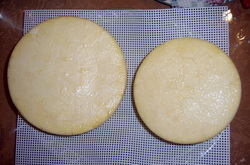
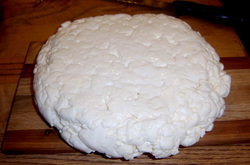
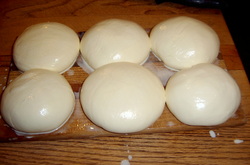
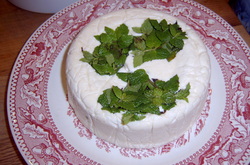
Picture
Here it is...

Picture
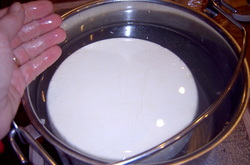
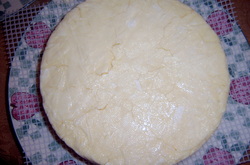
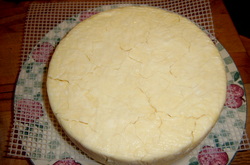
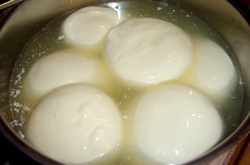
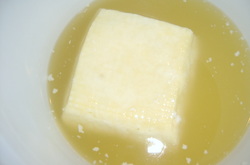
In a simple brine for 12 hours, flipping once.

Picture
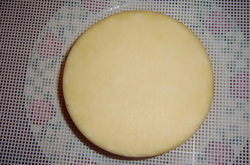
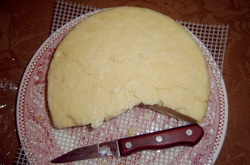
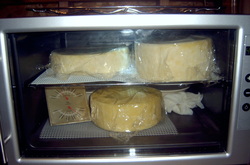
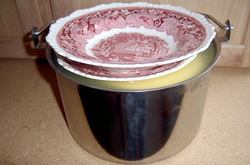
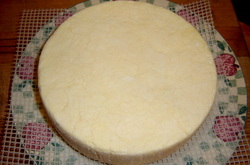
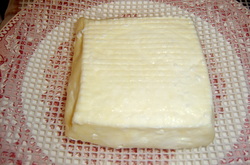
Let this air dry covered loosely with a flour sack towel. Air dry for 8 hours until this is dry to the touch, flipping once. Then put this in a ripening box covered loosely. Flip daily for one week. Then you can choose to have a natural rind, brushing off mold once a week with a brush or clean the rind with a simple brine solution twice a week. I think will be cleaning with a brine solution twice a week.

 
We were asked to make a Gouda or Havarti. I choose Havarti. This cheese is a favorite with my friends & family. I never heard of it before I took a cheese workshop in town last summer. It is a really easy cheese to make. Havarti is a washed curd cheese. Washing the curd gives this cheese a more delicate taste.
I used the recipe from my class that I took this last summer, as I really liked that recipe.

One important note. This is the last of the milk from my cows for this lactation. I dried up the cows to give them time before they calve in a few months.
Picture
Here are my supplies.

Picture
Warm milk to 86 deg. I added my culture. It was MM100, stir & let sit for 45 min.

Picture
Here I am stirring in the rennet. I let this rest for 20 min or till a clean break.

Picture
This is what a clean break looks like.

Picture
I have had really good luck cutting the curd large...to get the texture of cheese we were meant to have. I live in a dry area & am told cutting the curd larger will give me a cheese that is not overly dry. I sliced the curd at 2 inches & then made two swipes one way & two swipes the other direction. Then let this sit 15 minutes.

Picture
Reheat slowly to 98 deg. Stirring with a soft folding motion every 14 min. In this process we will start to wash the curd.  Dip out some whey & add hot water back to this every time I give it a stir.

Picture
Here I am dipping out whey.

Picture
I am dipping hot water. To add to the curds.

Picture
Here I am adding the hot water to my vat.

Picture
Doing this again. Removing whey & adding hot water. I do this every 15 min & give this cheese a stir using a folding motion. When curds clump together about an hour later, I will siphon off the extra whey & hoop the cheese.

Picture
Here I am hooping the cheese & I set this in a covered pot to help keep in the moisture. While this is hanging I prepared the moulds & measured out my salt...I am going to salt the curds then put in the moulds.

Picture
Here I am salting the curds!

Picture
This is where I dumped out the cheese, working fast I took this picture. On to the next step!

Picture
Now I put this in a cheese cloth lined tommee mould.

Picture
Set the follower lid on & 5 pounds of weight.

Picture
Flip in one hour & then that evening.

Picture
This is my cheese after skinning for 24 hours.

Picture
This is the cheese after it came out of the brine.

Appearance:  a large cheese!
Nose (aroma): Smelled buttery
Overall  Taste: buttery to nutty
Sweet to Salty:  slightly salty
(Mild) Mellow to Robust to Pungent  (stinky):  mild
Mouth Feel: (gritty, sandy, chewy, greasy, gummy, etc.): soft & smooth
 
Picture
I am so excited to show this I put this picture here at the top too!!!! YAY for cheese!

Asiago cheese is a firm pressed cheese from Italy. This is made either of cows milk or a mixture of cows & goats milk. Asiago is a brined cheese & has a natural rind. It is aged for one to two years and will be a hard grateable texture called stavecchio. If eaten at three weeks it is known as Asiago Pressato.
Picture
Here are my supplies all disinfected & laid on a clean cloth.

Picture
I decided to make a double batch...as I read small cheeses do not age well, so I doubled this to have two nice sized cheeses.
Warm the milk to 92 deg. Add the Thermo B powder starter culture & let it set for 5 min. After, it sets stir with an up & down motion.

Picture
The recipe asked to use a whisk & use an up & down motion to incorporate the culture into the milk.

Picture
I cover my cheese to help keep the milk warm. Let this set for 45 min to ripen the milk.

Picture
Stir in the rennet diluted in water.

Picture
Stir for one minute. I bought animal rennet & LOVE it so much more that the veggie rennet. The animal rennet as soon as you stir it in the milk you notice a change in the properties of the milk. Cover & let set for 1 hour or until the curds make a clean break.

Picture
Here the curds made a clean break.

Picture
Cut the curd the book says 1/2 inch cubes...but that does not work for me. I cut them at about 1 1/2 inches to 2 inches. Then I made a couple swipes down at an angle. Doing the cheese this way helps the cheese not to be overly dry...to the point that it can not be cut.

Picture
Let this set for 5 min undisturbed.

Picture
Over low heat, bring the temperature up to 104 deg over a 40 min period, I stirred carefully with a folding motion. This is what it looked like at the beginning of this 40 min time period.

Picture
This is what the curds looked like at the end of the 40 minutes.

Picture
Here I am stirring for 15 min. to help the curds shrink.

Picture
Heat the curd to 118 deg over low heat, stirring to firm up the curds.

Picture
This is to show how much the curds have changed. It is now 118 deg.

Picture
Cover & let set for 20 min to allow the curds to settle to the bottom.

Picture
Ladle off enough whey to expose the curds.

Picture
This is the exposed curds....ready to put in the press.

Picture
Fill the press with dampened cheese cloth. Put about 1/4 of the curds in each press. If I wanted to at this point they gave us the option of adding whole peppercorns...I do not like to add anything to my cheese so I skipped that step. Then put the follower on top & press with your hands to help the curds fit in the press easier.

Picture
Finish filling up the press with the rest of the curd. Place the cheese cloth on top. Press for one hour at 8 pounds.

Picture
This is pressing 8 pounds pressure...oh, here is a picture of a present my sister in law gave me....her name is Tilly a cow from Tillamook Cheese Factory. This is a remake of the cow they sold in the 1950s & 1960....it was made in the likeness of a cow they had.

Picture
Here is a picture of the clean dishes I just washed...from cheese making...what is missing is the 6 milk jars....as I had to skim the cream off of two of the gallons of milk.

Picture
I unwrapped the cheese & am flipping it & redressing it. This will go back in the press for 8 more hours. I then pressed it for 4 hours at 20 pounds pressure...it was to soft so I  pressed it for another 4 hours at 30 pounds. It really did not change the
softness....or get firmer. You know, in the past I had trouble making to firm of
a cheese....

Picture
This looks great! Ready to go in the brine for near 6 hours. I weighed this & it is 2 1/2 pounds. You need to brine this cheese for 2 1/2 hours per pound.

Picture
I am SO disappointed! To the fact that my real self came out. I am a quitter or a quitter at heart. I have never quit anything...I PUSH on...but I want to quit! When we had severe wind & were building our home, at one point after working in the severe cold & wind we finished putting on house wrap & lath & taped ever seam & staple, went to town to make cookies for a fun day & came home & every bit of our house wrap was blown off our two story home. I told my husband to BURN the house down & I would not have been sorry! I am glad we didn't burn it down. My husband told me he was not a quitter, I told him I WAS!
Well, with this cheese, after the last cheese Farm House Cheddar & all the cheddars  & parmesans to many to count that were inedible (the farmhouse cheddar was edible & yummy, just broken) I wanted to throw my hands up & NEVER make cheese again!
I cried out for help to Ian & Heather & Tiffany & Michelle....I was encouraged to look on the CheeseForum.org, there I looked at the trouble shooting. I found out the brine I used had to high of a ph. I was told that that brine would NEVER go bad. Heather cautioned me to be careful of checking the salt content & I had...but I never thought about it becoming acidic. I had tasted it every time before I used it & it is salty & I thought sweet & smelled fine. I did check the ph level in it & sure enough...what was happening is when I put the cheese in that brine it had a ph shock to the cheese & busted it apart.

I also learned that when you double the batch, using a larger mould you need to add more pressure of the pressing. That was the next error on this Asiago.

To help your cheese curds nit together, if you press them in a covered pot it will help keep it warmer & keep more moisture in giving you a better pressed cheese.

I put this cheese back into the press, the press into a pot, the pot in a sink of 120 deg water & pressed it at 40 pounds pressure for 12 hours.

Picture
This is what the cheese looks like that I repaired. It still has minor cracking. I made two of these, one in a press with a pressure scale weight & the other in a tommee mould. The tommee mould did not repair at all...so we are eating it
& it is really a FANTASTIC cheese!!!!! unaged!

Picture
Here is the other cheese from the tommee that I believe could not be pressed even though I put 40 pounds of weights on it....it is still very much broken, so we are eating it & did you know it is YUMMMMMYYY!!!!!

Picture
I STARTED all over & made a NEW ASIAGO with my newly found information. Here it is after being in the brine. I have two perfect cheeses from this new batch! The parts that I changed is, I pressed this at 20 pounds pressure right off the bat & pressed this for one hour & flipped. I pressed this for 10 hours. I then made a fresh brine of salt & water. I brined this for 6 hours. This cheese is as perfect as the last one was ruined!

Picture
This is my new little aging fridge. It is a small wine cooler. It says it will hold 8 wine bottles. I have three cheeses in it. The temperature control is perfect for aging cheese & with two bowls of water in it I have 80 percent humidity.

 
For the Month of December, we are asked to make Farmhouse Cheddar. This is a beautiful rustic cheddar. Using a stirred curd method, this recipe takes a lot of time out of the cheese process. This cheese only needs to be aged a short time, one month is the recommended aging.
Picture
Santize every thing. Here is what I needed for making this cheese.

Picture
I am doubling the batch, as I had 4 gallons of milk needing used. Warm the milk slowly over about ten minutes to 86 deg. I am warming it here.

Picture
Adding a culture to your milk will help with the curding process and flavor. We were to use Meso II, I could not order this from the place I choose to order my from. The place I ordered from suggested  I order this, as he said it will give cheese so much better flavor & I agree with him! WOW I noticed right away this is an awesome direct set culture. It is called RA22, made in France.

Picture
Sprinkle direct set culture on your milk. Let it set for 5 min & then stir, using an up & down motion.

Picture
I love pictures when you can see things moving, even though it is a still photo.

Picture
Let this rest for one hour. I put a towel around it, to hold the temperature.

Picture
I bought annatto colorant to make the cheese  yellow. You stir this into water to dilute it.

Picture
Stir into the milk.

Picture
Next stir the rennet into water to dilute the rennet. Stir this into your milk. Let set for 45 minutes, until there is a clean break.

Picture
Here is the clean break.

Picture
Cut the curd into 1/2 inch pieces....again, I am told that where we live it way to dry for this...so I cut my curd into 2 inch grid & make a couple swipes  sideways with the knife.

Picture
This is after I let it set for 5 minutes. It helps the curds to shrink a bit. You can see the whey that is separating.

Picture
Stirring the curds, as I am warming this slowly over 40 minutes to bring the temperature from 86 deg. to 102 deg.

Picture
Now stirring the curds for 20 min holding at 102 deg., this will allow the curds to firm up.

Picture
Holding the temperature at 102 deg. undisturbed for 30 minutes they will sink to the bottom of the pot. Next, ladle off the whey until the cheese is exposed.

Picture
Stir continually for 20 minutes, until the curds matt together & cling to each other when pressed in your hand. I didn't think it was long enough.

Picture
I didn't think that was enough so I continued to stir for another 15 minutes.

Picture
Still stirring & boy did my arm start aching from stirring & stirring...I thought about an auto cheese stirrer...ha ha ha h NOT TELLING LARRY! Cause he would find one & buy it for me! This is after 40 minutes of stirring. I said it is good enough...even though they really did not matt together...they started to get a little stretchy...like mozzarella.

Picture
Ladle this into a cheese cloth colander. Let this set for 5 minutes to drain. I put the colander into the big pot & put the lid on it to keep it warm & keep moisture in it. Then  sprinkle with salt & mix in quickly, breaking up the curds.

Picture
Working quickly, put this in a tomme mould lined with cheese cloth. I did a double batch of cheese, so I used a tomme & a cheese press.

Picture
Add 8 pounds of  for one hour, redress & press at 10 pounds of pressure for 12 hours.

Picture
Here is my cheese press with the other half of the curd.

Picture
This is after pressing for one hour. Flip & redress.

Picture
This is after pressing 8 hours. See the difference in the cheese! It is BEAUTIFUL!

Picture
This is so beautiful I have to... just have to show you the one from the press too.

Picture
Okay, in the brine solution for the day in a room that is 55 deg.

I will be adding more pictures tonight & tomorrow & a picture in about a month from now, as that is how long it has to age.

Picture
Last night I took my cheese out of the brine solution & seen it was cracked all over. I was so disheartened, I thought...it is the word cheddar that made this happen....I WANT TO MAKE CHEDDAR & have it work!

Picture
This is the other one....I made two at once....this is why I am involved in this cheesepalooza! for the HELP! Heather Squires, my friend from Nova Scotia, has worked in cheese factories all over the world, she told me cheese factories buy cheese pieces & repress it. So she advised me to put this in the press & press again.

Picture
I put the cheese back in the press & put it in a pot that was in the sink of hot water...I put a couple towels over it all to help hold in the heat. I flipped it 1 1/2 hours later & it was not enough, so I left it in the press 12 more hours.

Picture
This is what it came out like. You can still see little cracks, but not as bad. I left this out on a cheese mat for a couple hours & then I covered it lightly with saran wrap....cause I am concerned with the cracks. I decided to take a sample of this to our weaving & spinning guild. When I sliced the cheese it is all crumbly. It has an amazing cheddar flavor though! I am really impressed with it!

I know there were errors in this recipe, for one, the temperature at one point was wrong. They asked us to be to rough with the curds during the cheddar process. I also think they asked us to press  this with not a heavy enough weight. The last grave mistake is brining this cheese before you allow it to skin. I am disappointed with the out come of this cheese.
Picture
I made this cheese again. I did not heat the curds to 102 deg this time. I heated the curds to 98 deg. I also did not stir the curds for 20 min non stop stirring. I stirred them every 15 min gently.  I salted the curds before I pressed this.  I put the press in a pot & covered the whole thing as I pressed this. I also pressed this at 15 pounds for 20 min, then 30 pounds for 20 min, then 30 pounds for 2 hours then 40 pounds for 16 hours. When I removed it from the press it looked great. I let it air dry in a room about 70 deg...that is what the temp was when in the press. I looked at it a couple house later & it was cracked! I WONT GIVE UP! Try, try again! I sure would like to know how I can make this work!

Picture
This is a close up shot of the cheese. I since coated the cheese with olive oil & covered it with a flour sack towel.

 
The month of November we are asked to make Mozzarella. This cheese is Italian (meaning to tear) was originally made with Water Buffalo milk. Here in North America most all of Mozzarella is made with cows milk.

This recipe is intensive...I didn't just say that it is wrote in the preface of this recipe! I have made Mozzarella a lot of times & never used a method like this Traditional recipe.
Picture
This is most of my supplies to make Mozzarella. I will show you what I forgot to put on this photo in the next photo! HA!

Picture
I doubled the batch, heating two gallons of whole milk to about 95 deg. I then added Thermo B powder to this.

Picture
After I sprinkled this Thermo B on top of the milk, I let this sit for 5 minutes. It allows the Thermo B powder to rehydrate. I stirred this in well.

Picture
Using a towel, this helps keep the milk from loosing the temperature I want this milk to stay at for ripening. Ripening process is forty-five minutes.

Picture
At this point I add rennet diluted in water & stir in with an up & down motion for 60 seconds. This is covered again & let it rest for 1 hour or until there is a clean break.

Picture
Here is the clean break.

Picture
I do not follow the directions here...as I have said before...I have made cheese that was way to dry...so instead of cutting the curd into 1/2 inch pieces I cut them into 2 inch grid and made a couple swipes diagonal in two different directions. Then I stir this with a CAREFUL folding motion.

Picture
Next, I begin to raise the temperature slowly over 30 min from 90 some deg to 105 deg. This picture is about 10 min into this process.

Picture
I took this picture about 20 min into this process. You can see the curds are starting to shrink. Still stirring with a careful folding manner.  At this time, you let the curds rest for another 10 min, stirring. After this process, let the curds set for 15 min so the curds will fall to the bottom of the pot.

Picture
We put this in a cheese cloth lined colander for the whey to drain off the cheese for 15 minutes.

Picture
I then put the curd mass into a pot in the sink of water at 105 deg for two hours, flipping twice...this is about 30 min into that.

Picture
This is almost two hours into this process. I have flipped this twice now.

Picture
I never used the PH strips...so for fun...I have 15 min left of the two hours. I tested this...The test turned out higher than 6.2...I need 4.9 & 5.2....my first test is berry red...it needs to be tan to slight pinkish tan.

Picture
It has been two hours of testing the PH every 30 min. You can see in my very poor quality photo that the PH is coming down. I (THINK) I'm close! Can you hear my thoughts? I think I want a digital PH tester...

Picture
I checked, waited, checked, waited, checked...you get the picture! ha haha they say when the PH drops to 5.6 it will drop FAST....so start checking every 15 min. I did that a few times, well more than a few. NEXT picture will show you! It is ready...as good as I can tell. This process took two more hours.

Picture
This is the tests! ha ha ha haha

Picture
I took it out of the pot & let it drain in the colander for a few min. while I was heating the water to near 180 deg. 

Picture
I cut this into 1 inch cubes...but I think it was GENEROUS one inch cubes.

Picture
Putting in a pot of 180 deg water, I worked this with two wooden spoons to mat it together & knead it.


Picture
You can see this starting to mat together. I am working it, kneading & helping this form a solid ball.

Picture
I am starting to stretch this. This was my first attempt to stretch this. I did not use plastic kitchen gloves, cause I DID NOT like the smell of them & wondered what chemicals it put in the cheese.

Picture
CAN YOU SAY STRETCH? It was pretty impressive in real life...if I had someone else to take a picture, just maybe we could be in the gennis book of world records. ha haha

Picture
This is after I shaped them. They are soft. I am hoping! After I took them & shaped them they flattened out...so just maybe they will be soft! I did not dip them in ice water, as I was able to just pick them up & give them a quick reshape!

Picture
In the brine they go. This is brine I made of salt & whey. I am told it NEVER goes bad. I tasted it & it is salty & sweet still, I think I made this brine in August.

Picture
I put a plate on this, to keep the cheese submerged. This will be done in 20 min. Next picture my cheese is done for this month! YAY!!!!!

Picture
Here is my finished cheese! It is soft! I am SO GLAD!!!! Firm enough that it holds its shape, but soft to cut & soft in my mouth.

Appearance:  heaven
Nose (aroma): Smelled sweet
Overall Taste: Tasted sweet & tangy, almost a fruity tone.
Sweet to Salty: Slightly sweet and a little salty
Mild (mellow) to Robust to Pungent (stinky):  mild
Mouth Feel: (gritty, sandy, chewy, greasy, gummy, etc.): very smooth & creamy & melty & cheesy, with a slight little squeak!
YUM!
 
We are asked to make Halloumi for the month of October.  This is a cheese that originated in Cypress. Traditionally made of sheep's milk or a combination of sheep's & goats milk. Mine will be made with cows milk, cause that is what I have. I will add Lipase powder (an enzyme) to the milk to simulate sheep's or goats milk. Halloumi is a hooped, brined cheese.

Picture
This morning I milked my cows.  I came in strained this through flour sack cloth into a gallon jar. The picture shows my supplies for making this cheese.

Picture
Here I warmed the milk to 90 deg. I am preparing to add the Lipase powder. You add this lipase powder to water to dilute it.

Picture
Stirring the lipase powder into the milk with an up & down motion using the slotted skimmer.

Picture
Dilute rennet in water to make this milk into cheese.

Picture
Stir the rennet mixture into the milk using an up & down motion for 1 minute. I use an imported animal rennet. I just like the way it changes the milk properties & like the flavor of the animal rennet better than the vegetable rennet.

Picture
Using the up & down motion incorporating the rennet into the milk.

Picture
When the milk rests for 30-40 minutes...this should make a clean break. It does.

Picture
Here I am cutting the curd. It says to cut it into 3/4 inch squares...but I live in such a dry part of the country, I cut mine more of an 1 1/2 & then make a couple swipes diagonal both directions. This will allow my cheese not to be overly dry & end up being like it is suppose to be.

Picture
Heating the milk to 104 deg over a 15 minute period. Stirring gently you can see the curd changing.

Picture
This sets at 104 deg for 20 min. See the curds taking shape.

Picture
The recipe says to let this set for 5 minutes. The curds sink to the bottom of the pot. This whole time I kept the temperature at 104 deg. by putting this in a sink of hot water.

Picture
I carefully ladled the cheese curds into a cheese cloth lined colander, saving the whey for another step in this process. I put the whey in the fridge to keep it from souring. This cheese will set  in the cheese cloth lined colander for 15 min. This process is called hooping the cheese. Resembling Cypress we put mint leaves on the cheese...to impart a flavor of  mint into our cheese.

Picture
The next step is to carefully pick up the cheese & set into the cheese cloth lined 5 inch tomme mould. I then folded the cheese cloth over this cheese & put the top follower on & a weight to begin the pressing.

Picture
This is the whey that I put in the fridge. It sours fast...by putting it in the fridge you keep it sweet. We will use this in about 6 hours from now.

Picture
Here I used a water jug. This is 8 pounds, as I weighed the water jug. The cheese will press for 3 hours.

Picture
Flipping the cheese. Doing this makes a more evenly pressed cheese. I unwrapped the cheese this is the picture here. Undressed the cheese cloth I trimmed the edges, mostly to sample the cheese (OH MY so yummy! I think I have never tasted such a glorious cheese before!) & flipped the cheese, redressed & put the weight back on. Three more hours of pressing.

Picture
I unwrapped the cheese. Now I am going to cut it square, near 4 inches by 4 inches and remove the mint leaves.

Picture
Here it is cut square, I am warming up the whey to 190 deg...taking 1/2 hour to bring it up to temp.

Picture
I put the cheese in the whey that is 190 deg. I can see that some of the milk solids left in the whey are turning to ricotta. This part was frightening...it said DO NOT LET IT BOIL....I did not let it boil....but I could see the ricotta swimming around & felt like yikes....will my Halloumi melt? NOPE it didn't!

Picture
You can see after about 20 minutes it started to look like it would float a little. When it shrinks a little & floats it is ready to come out.

Picture
It is floating & ready to come out of the pot of hot whey.

Picture
I scooped it out of the pot & am going to let it rest on a mat.

Picture
I am letting it rest for 40 min flipping once to let it dry. It feels like a soft marshmallow...it held it's shape great!

Picture
I put the Halloumi in the brine solution. It will stay here 5 to 20 days.

Picture
I set my grill on the burner & turned it on while I put the ends in the brine. They were in the brine for about 40 min. I did this while the main cheese was resting & drying.

Picture
Oh!!!!! I can NOT tell you how yummy this is!!!!! OH MY!!!! The taste is like NOTHING I have ever ate! SO YUMMY!!!! This was perfectly little salty, a very suttle HINT of mint & melt in your mouth!!!! This is served on a wooden plate my son made me & on a hand woven cloth my Aunt that taught me how to make cheese  gave me for Christmas a few years ago.

Appearance:  Grilled to a golden brown.
Nose (aroma): Smelled like fried mozzarella.
Overall Taste: Tasted like fried cheese, a "hint" of salt & mint (if I wouldn't have made this...I would not have even tasted the mint)
Sweet to Salty: Slightly sweet & ever so slightly salty...as mine was in the brine only one hour.
Mild (mellow) to Robust to Pungent (stinky):  mild
Mouth Feel: (gritty, sandy, chewy, greasy, gummy, etc.): very smooth & creamy & melty & cheesy on the inside & slightly crunch & like satin on the outside.
YUM!

 
I joined a cheese challenge. We are going to be making one cheese a month. I am excited about this as I want to perfect my cheese making. We can ask questions & get help along the way. I have already used this service & am so glad to say...I got the help I needed.

I started out my cheese making day by milking our family cows. Then I took the milk in the house & strained it though a flour sack towel. I then added butter milk to my milk & warmed this to 86 deg. We were to warm it to 80 deg, but I live at an altitude that required me to adjust my thermometer. I tested the thermometer by boiling water for 10 minutes & then testing the thermometer. It should have read 212 But it read 206. So when I make cheese I am going to be adding 6 deg to what I am checking with the thermometer. I then covered this & let it set in my oven over night. The next morning you could see the whey sat on top of the curds. I cut them just enough to get them into the cheese cloth colander. Then I drew it up & hug it over my pot for 8 hours. I wonder if I should have flipped this half way, as the cheese up towards the top of the cheese cloth was drier than the cheese at the bottom of the cheese cloth. I could not have flipped this as I was away from home that whole afternoon. I then took the cheese & undid the cheese cloth & put this all in a dish. I shaped several logs The log on the bottom has cayenne, fresh cracked black pepper corns & red pepper seeds; the middle one has fresh herbs from the garden,  chives, dill & garlic; the top cheese has tarragon, marjoram, & parsley I dried from my garden.

I was a little late making last months cheese so I did that cheese the same day I did this chevre. My family love the chevre lots more. They said the texture was wonderful, it smelled & tasted delightful & makes a great cheese spread. I made homemade crackers to serve this with. I have never made chevre & I am so glad I joined this cheese challenge as it motivated me to try out this recipe!
The pictures for this are on the right towards the top of the page. It is labeled Chevre Cheese.


Lemon Ricotta
I really loved making lemon ricotta. I used 1 gallon of milk, 3 cups of heavy cream, 1 tsp salt, warmed to 86 deg(cause I tested my thermometer, I needed to add 6 deg.) You need to heat your milk to 80 deg. I squeezed 4 Tbs of lemon juice. I added the lemon juice stirring in an up & down motion for 5 seconds. I let this stand for 30 minutes. I placed the curds in a cheese cloth lined colander, sprinkled the remaining 1 tsp salt tossing curds. I hung this for 2 hours. Then I scraped this into a pretty dish. I think I got close to 2 cups of ricotta. This ricotta was so yummy!!!! I LOVED it. Loved the texture, loved the flavor of the lemon notes left in your mouth after you swallowed it. We served this over muffins.

I was not happy with how much milk was left in the whey...so I added 1 Tbs of water with 3 drops of rennet, stirred this in & let that sit all night. The next morning I scooped those curds into a cheese cloth lined colander. I hung this for 8 hours. The curds that I got from this has a slight lemon flavor. These still have that fine grain that ricotta has....but this cheese is more smooth. I am glad to save more of the cheese. I will use this as a dip adding spices to this.

I have made traditional ricotta using whey left from making cheese...I have never made lemon ricotta & I really loved the ease & how quick you can get cheese.
The pictures for this cheese are on the right towards the top of the page. It is labeled Lemon Ricotta.